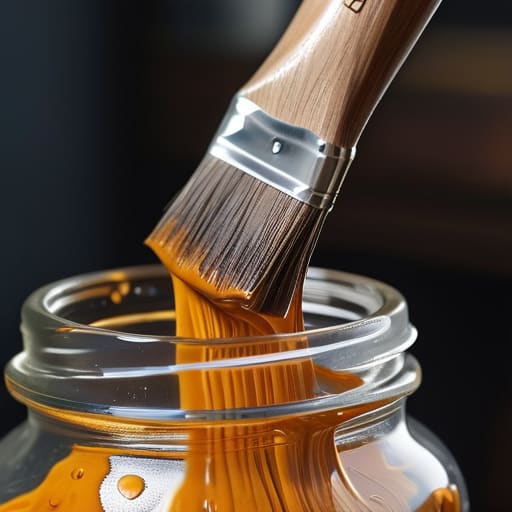

I once watched a young, incredibly talented painter—the kind of talent that makes a gallerist hold their breath—completely ruin a three-hundred-pound series of oils because he treated his tools like afterthoughts. He thought a quick rinse in a jar of turpentine was enough, but by the third week, his bristles were stiff, splayed, and utterly useless. Most artists treat brush care as a chore to be rushed through at the end of a long session, but if you want to understand how to clean paint brushes effectively, you have to stop viewing it as cleaning and start viewing it as asset management. A ruined brush isn’t just a nuisance; it is a direct hit to your overhead and a subtle thief of your technical precision.
I’m not here to give you some flowery, romanticized lecture on the “soul of the brush.” Instead, I’m going to give you the unvarnished, practical mechanics of maintenance that I learned while watching professionals work and watching amateurs fail. We are going to cover the exact solvents you actually need, the proper way to reshape bristles to ensure they last for years rather than weeks, and the critical mistakes that turn expensive sable into scrap.
Guide Overview
Tools & Supplies
- Basin or bucket for soaking brushes
- Old comb or brush comb to remove dried residue
- Paper towels for drying
- Water or appropriate solvent (water for latex, mineral spirits for oil)
- Mild dish soap or specialized brush cleaner
- Rags or microfiber cloths
Step-by-Step Instructions
- 1. First, clear your workspace of anything that isn’t essential; you cannot perform surgery in a cluttered kitchen, and you cannot clean a professional-grade brush in a pile of dried-up palette scraps. Start by wiping the excess pigment off the bristles using a lint-free rag or a bit of newspaper, pressing firmly but never scrubbing side-to-side like you’re trying to erase a mistake. You want to remove the bulk of the color before it hits the water, otherwise, you’re just making a muddy, expensive mess of your cleaning solution.
- 2. Next, select your solvent or cleanser with the same scrutiny you’d use to select a frame for a finished piece. If you’re working in oils, use a dedicated brush cleaner or a high-quality solvent, but for the water-based painters, a mild, pH-neutral soap is your best friend. Avoid those harsh, industrial degreasers that promise instant results; they might strip the paint, but they’ll also strip the life out of the natural hair or the delicate synthetic filaments you’ve paid good money for.
- 3. Once you have your medium, submerge the bristles—not the ferrule, for heaven’s sake—and begin the agitation process. Swirl the brush in the palm of your hand or against a textured cleaning mat using gentle, circular motions. This isn’t a chore to be rushed; it’s a mechanical process of lifting pigment from the core of the brush head, and if you aren’t careful, you’ll end up with a brush that looks clean on the outside but is still holding onto a hard, dried knot of color deep inside the base.
- 4. Rinse the bristles repeatedly under lukewarm water, changing your cleaning solution as soon as it turns the color of a bruised plum. You must continue this until the water runs crystal clear; if you see even a hint of a tint swirling in the sink, you haven’t finished the job. I’ve seen artists try to skip this step only to have a “clean” brush ruin a pristine white linen canvas three weeks later, and quite frankly, that is a level of professional negligence I won’t stand for.
- 5. After the rinse, use your fingers to gently reshape the bristles into their original, intended form. This is the moment where you check for any broken hairs or splayed ends; if the shape is gone, the brush is effectively devalued, much like a painting with a poorly executed edge. Don’t use your fingernails to “comb” them, as you’ll only cause more damage; use a soft, clean cloth to squeeze out the excess moisture by pressing the bristles against it.
- 6. Finally, lay them flat to dry on a clean towel, ideally with the heads hanging slightly off the edge of a table. Never, under any circumstances, should you store a wet brush upright in a jar; gravity is a cruel mistress, and she will pull the moisture and residual pigment straight down into the ferrule, where it will permanently glue the bristles together. Treat your tools with the same respect you expect a collector to treat your work, and they will serve your career for years instead of months.
Cleaning Natural vs Synthetic Brushes Knowing Your Investment
If you’re working with sable or any other high-end natural hair, you aren’t just holding a tool; you’re holding a piece of capital. Natural bristles have a structural integrity that synthetic fibers simply cannot replicate, which is why they hold a point so beautifully. However, they are temperamental. You cannot treat them with the same aggression you might use on a cheap nylon brush. When you are cleaning natural vs synthetic brushes, remember that natural hair is protein-based. If you use harsh chemicals or let even a hint of pigment settle into the ferrule, you are effectively killing the tool.
Synthetic brushes are the workhorses, especially for those of us who spend our days wrestling with acrylics. They can handle a bit more abuse, but they aren’t invincible. If you find yourself struggling with removing dried acrylic paint from bristles, don’t go hacking at them with your fingernails. That’s how you ruin the shape and lose the value of the tool entirely. Whether you’re using a gentle soap or a specialized medium, the goal is the same: respect the ferrule. If paint migrates into that metal neck, the brush is dead to you.
Preventing Paint Buildup on Brushes Before It Devalues Your Work
Listen, I’ve seen many a promising artist lose their edge—not because their vision faltered, but because they were working with tools that had become stiff, clumsy caricatures of themselves. If you wait until the end of a session to address your tools, you are already playing catch-up. The real secret to preventing paint buildup on brushes isn’t found in a heavy-duty cleaning ritual at midnight; it’s found in the discipline of the mid-session rinse. If you are working with oils, keep a jar of the best solvents for oil based paint within arm’s reach, and don’t let that pigment sit in the ferrule for more than a few minutes of inactivity.
Treat your brushes like your professional reputation: don’t let them stagnate. If you find yourself mid-stroke and notice the drag increasing, stop. A quick dip in water or solvent is far more efficient than the frantic, desperate struggle of removing dried acrylic paint from bristles later that evening. Once you start neglecting that preventative rinse, you aren’t just ruining a brush; you are fundamentally altering the way your medium sits on the canvas. Precision is expensive, and you can’t afford to lose it to a bit of laziness.
Five Hard Truths About Keeping Your Tools From Becoming Trash
- Stop treating your brushes like disposable commodities; if you’re using cheap synthetic bristles for fine detail work, you’re already fighting a losing battle against quality.
- Never, under any circumstances, let paint dry in the ferrule, because once that dried sludge hardens, you aren’t just losing a brush—you’re losing the precision that justifies your price point.
- Don’t get lazy with your solvents; if you’re just rinsing the surface and leaving a film of pigment in the base, you are essentially sabotaging the lifespan of your most expensive assets.
- Learn to respect the shape; if you leave your brushes sitting bristles-up in a jar like a neglected houseplant, you are permanently warping the tool and devaluing your ability to execute clean edges.
- Treat your cleaning process as part of your overhead, not an afterthought; a well-maintained brush is a predictable expense, while a ruined one is a sudden, irritating hit to your profit margin.
The Bottom Line on Your Tools
At the end of the day, cleaning your brushes isn’t some tedious ritual designed to waste your studio time; it is a fundamental act of asset management. Whether you are working with delicate natural sable or a sturdy synthetic blend, the principle remains the same: if you neglect the tools, you are essentially devaluing your own inventory before the paint even hits the canvas. You’ve learned how to strip the pigment, how to respect the ferrule, and how to prevent that dreaded buildup that turns a professional tool into a useless stick of hair. Treat your brushes with the same discipline you apply to your composition, and they will reward you with years of consistent performance rather than a sudden, expensive trip to the art supply store.
I spent decades looking at finished works in my gallery, and while I was always looking for the genius in the brushwork, I was also looking for the consistency of the hand. A painter who respects their tools is a painter who respects their craft, and that discipline translates directly into the quality of the work they eventually bring to market. Don’t let the romantic myth of the “starving artist” convince you that technical maintenance is beneath you. You are a professional, and protecting your margins starts with the very things you hold in your hand every single day. Now, go clean up and get back to the work that actually matters.
Now, I know what you’re thinking—why am I lecturing you on cleaning supplies when you’d rather be at the easel? Because I’ve seen too many talented artists lose their edge simply because they couldn’t control their materials, and frankly, professionalism begins in the studio. If you find yourself struggling to manage the sheer logistics of a growing practice, or if you’re looking for ways to find more balance and connection in your personal life outside the studio walls, sometimes looking into things like mature sex contacts kent can provide that much-needed distraction from the solitary grind of the working artist. It’s about maintaining your equilibrium; if your personal life is a shambles, your brushwork will eventually reflect that chaos, and no collector is going to pay top dollar for a lack of discipline.
